Out of the many different trip planning tools, the Google Maps Trip Planner may be the best. When you don’t have the right tools, trip planning can be so difficult and chaotic. But the Google Maps Trip Planner allows you to put everything you need all in the same place.
If you’re the kind of person that gets loads of trip recommendations and inspiration but doesn’t know how to organize them, the Google Maps Trip Planner is ideal for you! You can lay out all of the recommendations, organize them by category, and visualize how far apart they are from each other.
If you’re a road tripper, the Google Maps Trip Planner is ideal for you too! You’ll be able to map out each day of the road trip AND the overall road trip on the same map. Then, you’ll never forget about a stop that you want to make.
Basically, no matter what kind of traveler you are, the Google Maps Trip Planner will make your trip planning process super easy!
Why You Should Plan A Trip In Google Maps
You Can See Everything In One Place
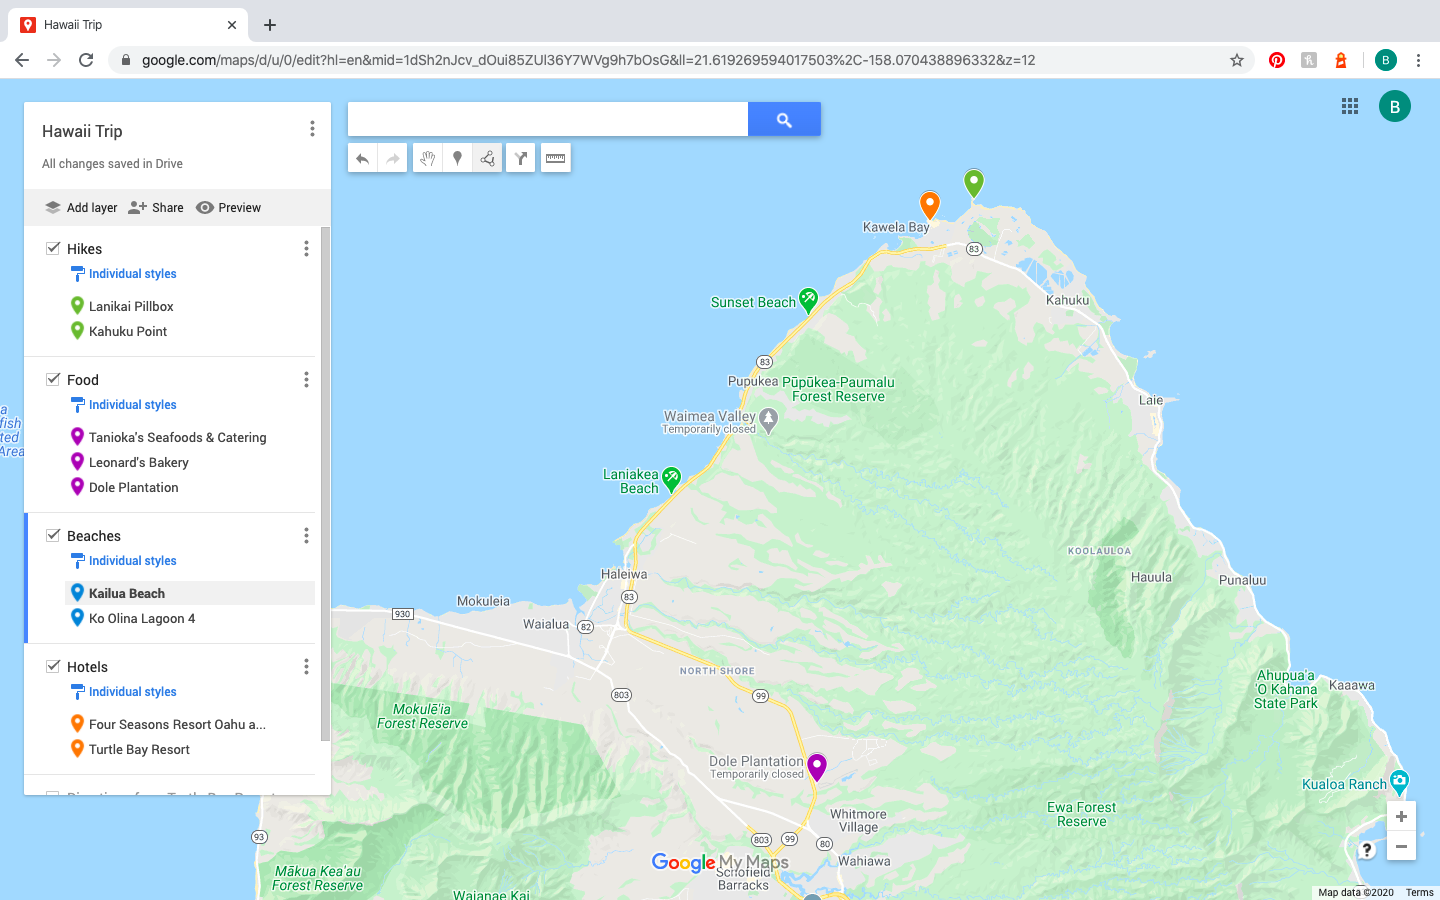
If you’re a visual learner, planning a trip on Google Maps may be the trip planning tool that you’ve been searching for all along! Rather than having a list of activities, restaurants, hotels, and airports with no idea what they look like or where they are in relation to one another, the Google Maps trip planner allows you to see everything in one place!
Google Maps Allows You To Color Code Based On Attraction
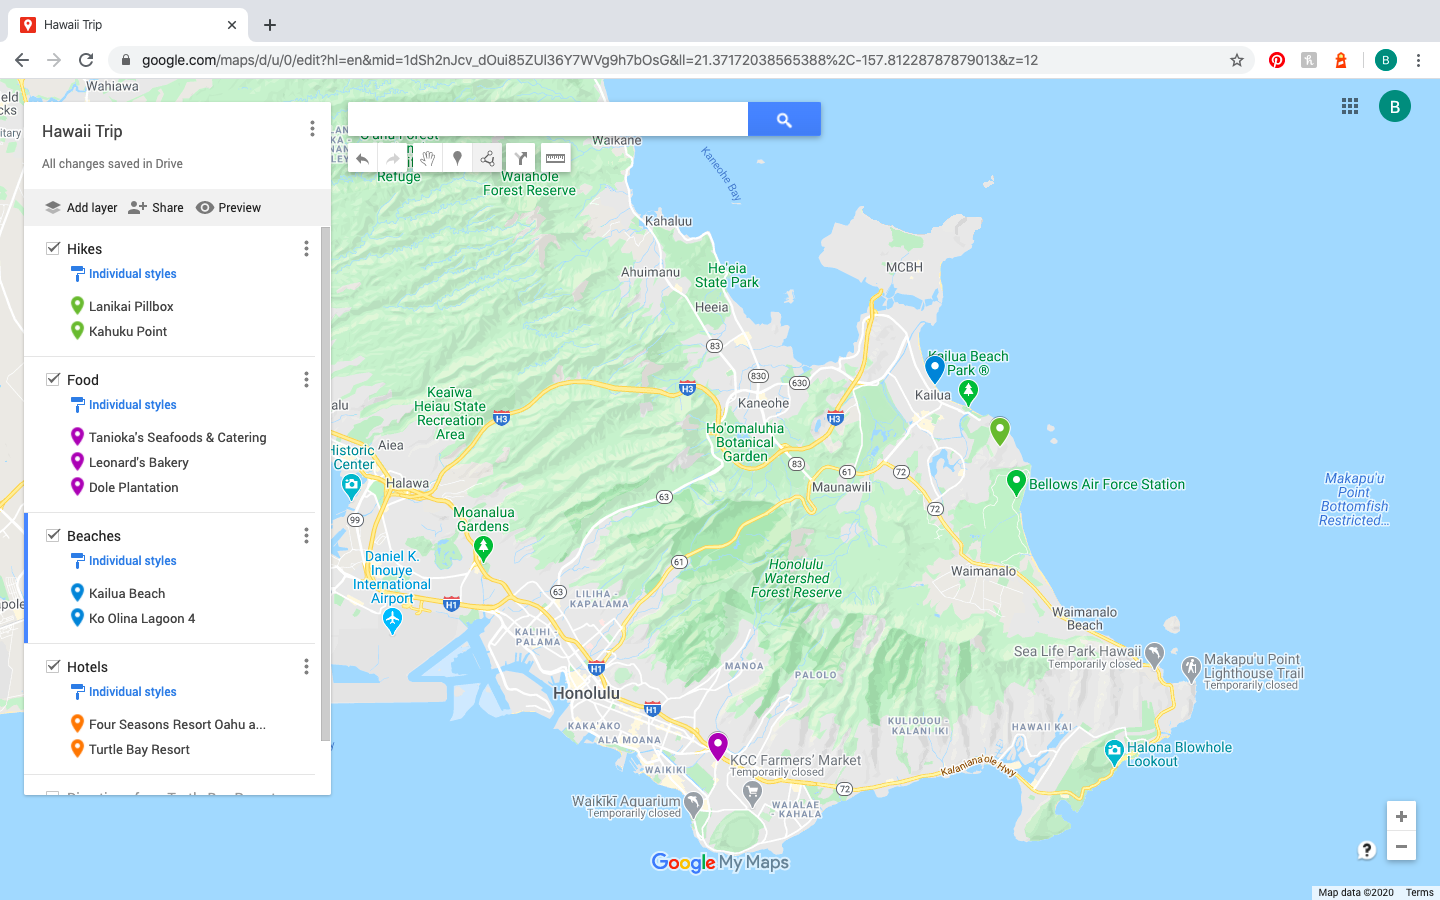
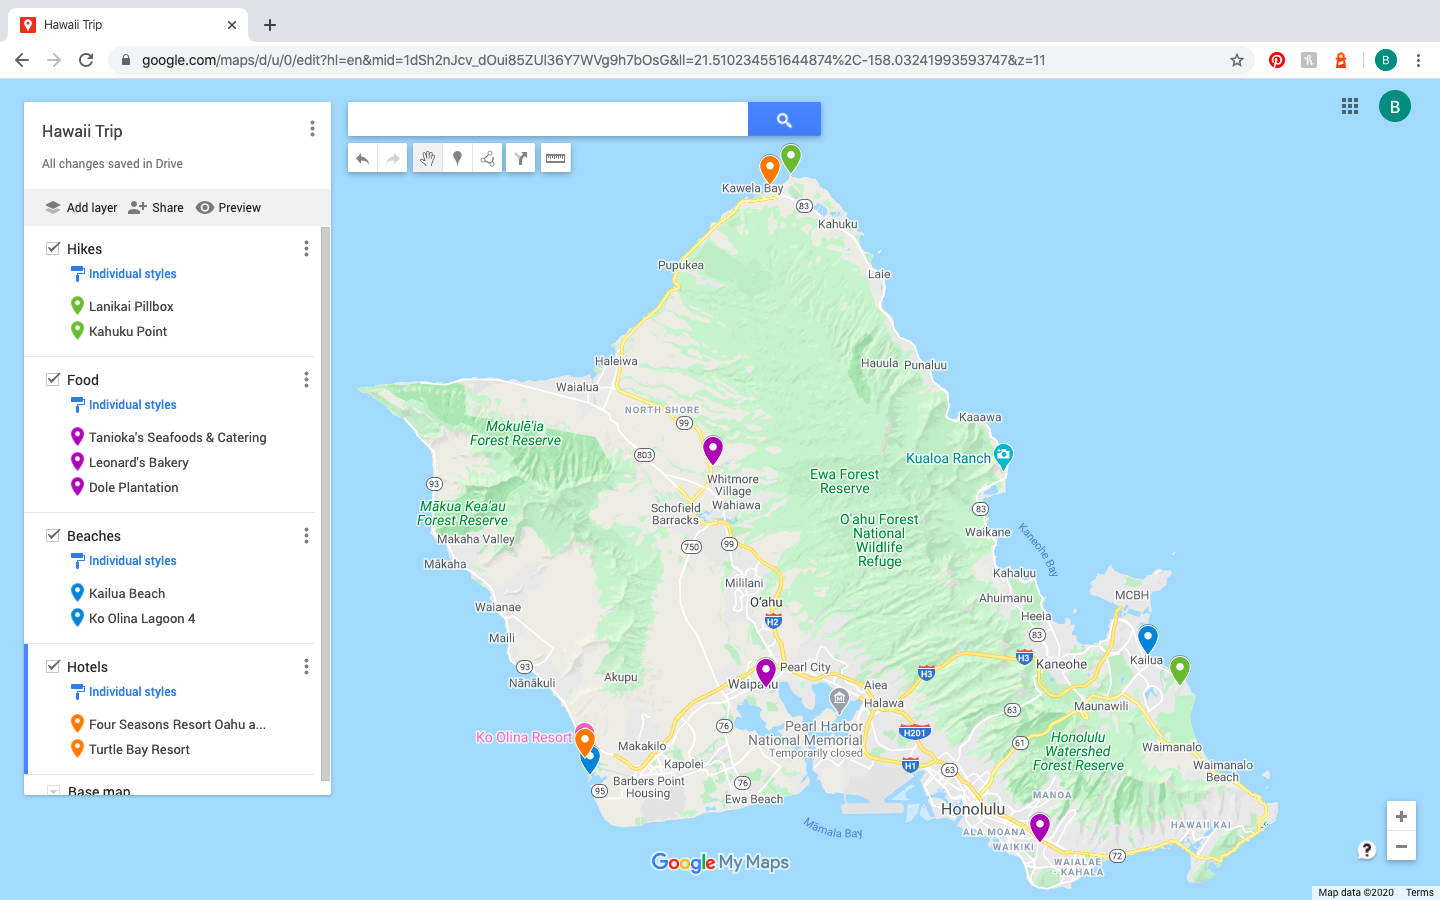
In case seeing everything in one place sounds a bit too overwhelming, you can color code everything! Through a layering process (explained below), you can separate each type of attraction by area and then color code them. For example, you can make beaches blue, hikes green, and churches purple. Then, after just a quick glance at a map, you’ll be able to see what types of attractions you’ve added to your itinerary.
Google Maps Seamlessly Integrates Between Devices
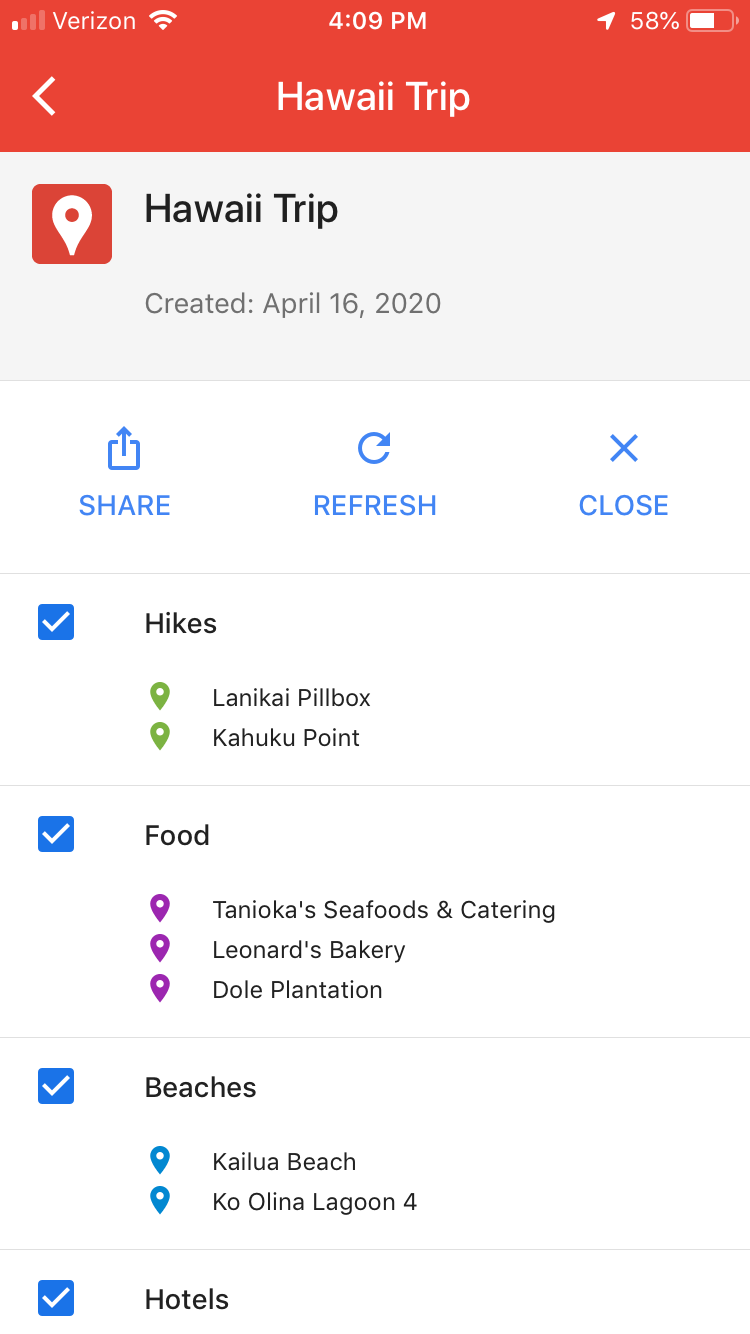
This is one of the best features of the Google Maps Trip Planner. Everyone wants to plan a trip on a computer, but, at the same time, when you’re actually on the trip, you want all of the information on your phone. With other trip planning options, it can be a pain to try to transfer all of the information from one device to another. But with the Google Maps Trip Planner, it’s seamless! As long as you have the Google Maps app downloaded and you’re logged in to the proper account on both devices, you’re all set!
Google Maps Allows You To See Where Your Possible Stops Are Located
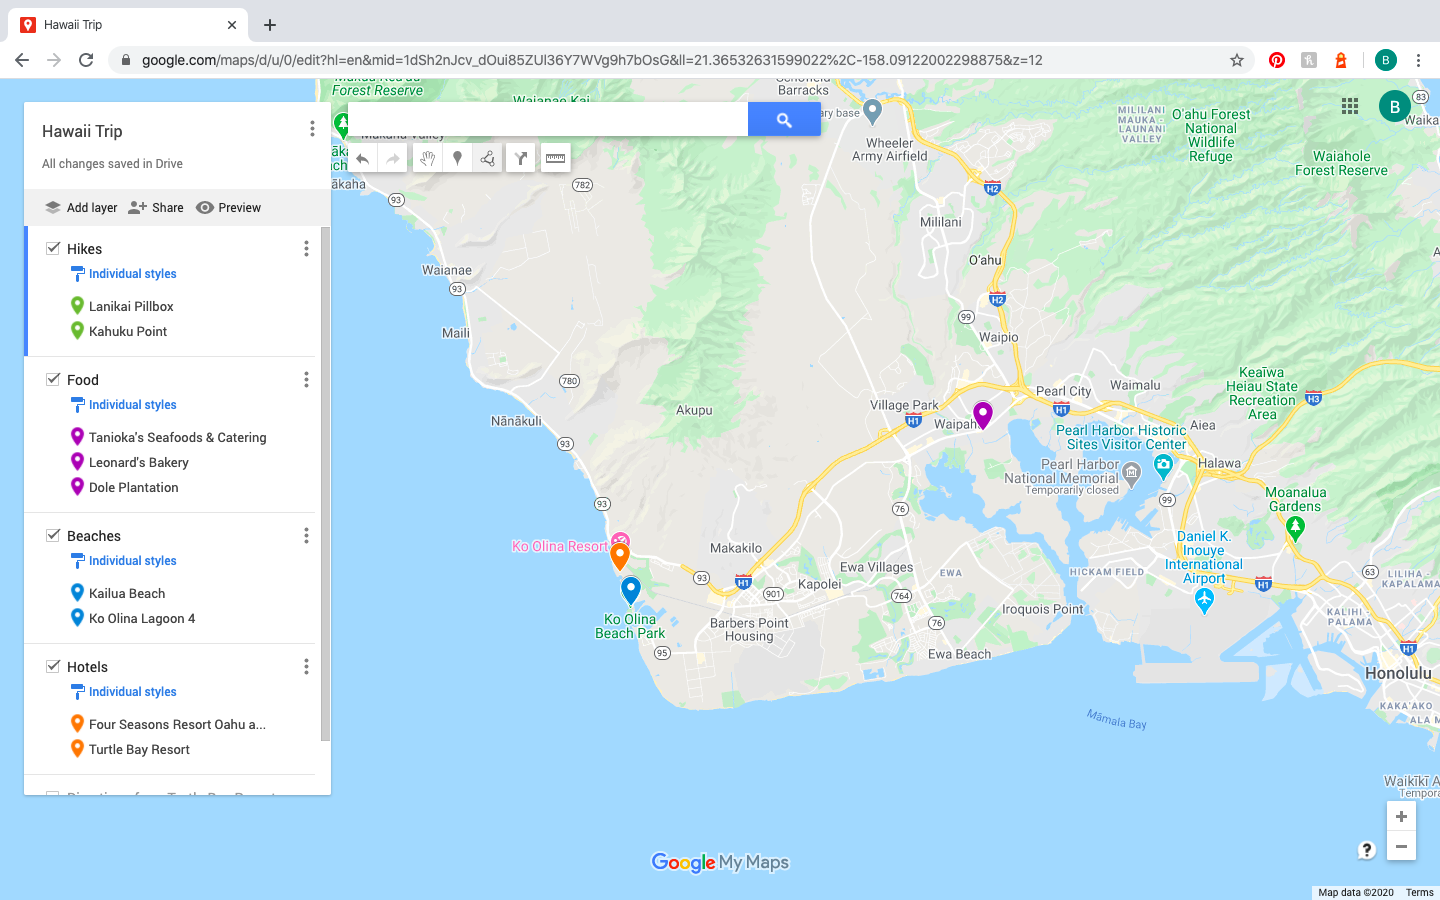
First and foremost, Google Maps is a map. This means that you’ll be able to plot out each of your stops and see where they are in relation to one another. This is perfect for planning an itinerary for each day, because, if there are a bunch of activities clustered together on a map, you’ll be able to decide if you can do them all in one day.
Along the same lines, if there’s one activity super far out of the cluster, you’ll know in advance. This will allow you to either skip that activity (and avoid driving for longer than you would like) or find more things to do near that activity.
Planning A Trip In Google Maps Is Great For Group Travel
In the same way that you can color code your Google Map trip planner based on attraction, you can also color code based on group member. Then, every group member will be able to add the things that they would like to do in their chosen color. So rather than having a lengthy, unmanageable list of everyone’s wish list of things to do, you can see everything in one place.
Google Maps Allows Photographers And Content Creators To Plan Out The Best Stops For Photos
Planning a trip in Google Maps is ideal for photographers and content creators. You can layout and map all of your potential photography or content spots in one place. If it makes it easier for you, you can color code them. And to help you remember everything you need to know about each location, you can add photos or notes to the marker on Google Maps.
Ways To Use Google Maps Trip Planner
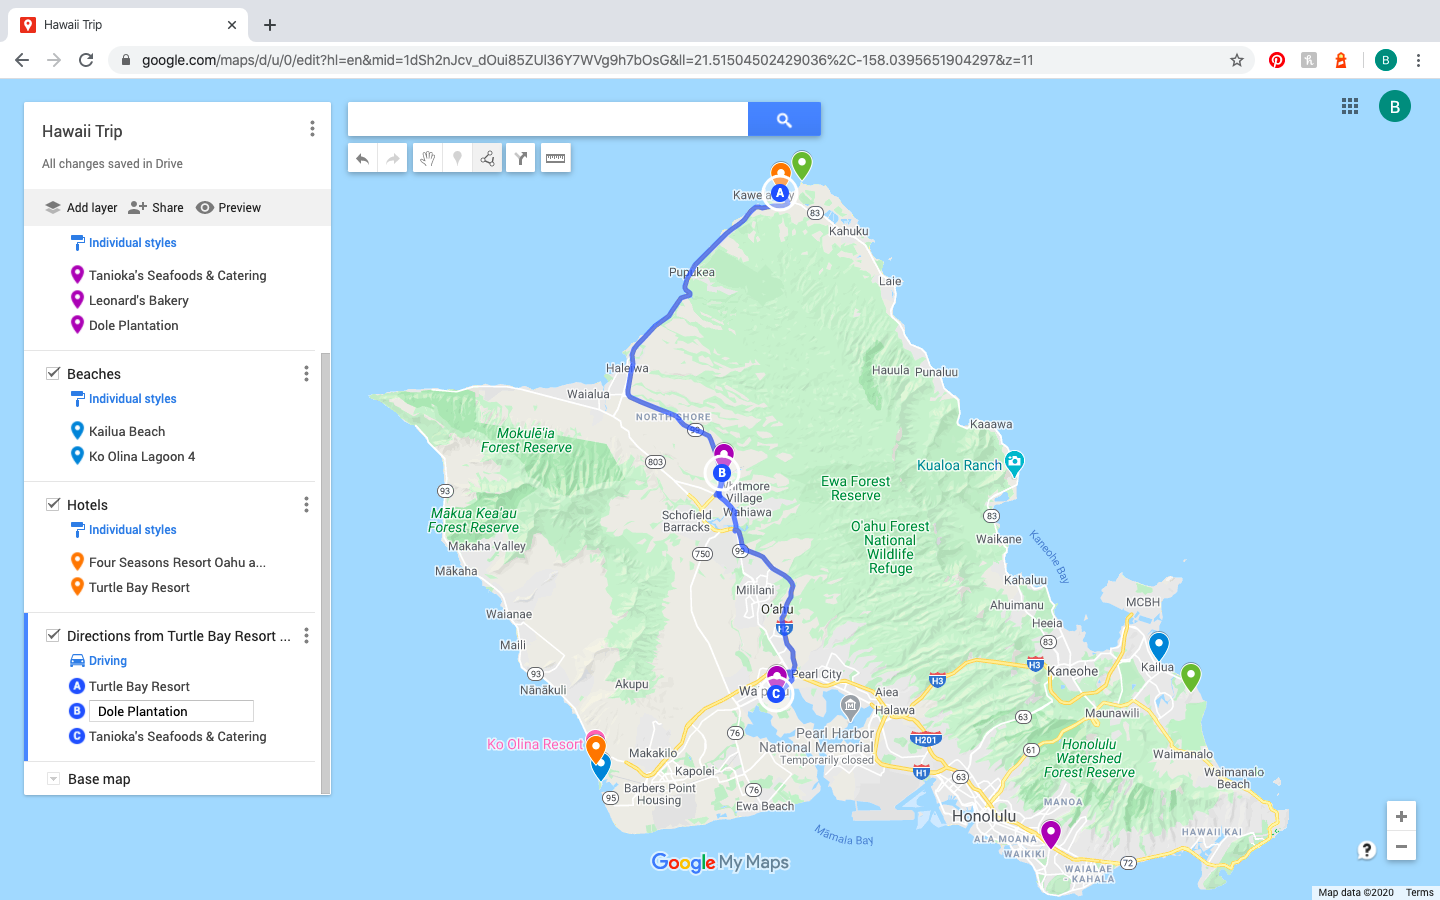
Use Google Maps To Plot Out Your Vacation Or Road Trip Itinerary
Google Maps is ideal for planning out your vacation or road trip itinerary! By mapping out everything you want to do in one day, you’ll be able to set more realistic itineraries. For example, while using the Google Maps road trip planner, you’ll know exactly how long the drive will take. Is that amount of time doable for you and your group? Will you have enough time to make the stops that you want to make? After answering those questions, you can adjust accordingly. And the same concept applies to planning out each day of your vacation.
If you’re planning a longer road trip, you can also use the color-coding layers of the Google Maps trip planner in a new way. Each layer can represent the itinerary for one day – you can add all of the stops that you want to make for that day – and then, when you look at all of the layers at once, you can see the overall itinerary. Do know that the Google trip planner allows for a maximum of ten layers, so this only works for road trip itineraries that are ten days or less. As a work around, you can split the itinerary in half and use two different maps.
Save Inspiration On Google Maps For Future Trips
Many of us gather tons of inspiration before each of our trips, whether that’s from Google searches, Pinterest pinning, Instagram posts, travel magazines, or suggestions from friends and family. If there are particular destinations that you find yourself drawn to again and again, consider saving all of these pieces of inspiration on Google Maps for your future trip!
Let’s be real. When we finally get to planning our trips, none of us actually remember all of the recommendations that we’ve found or heard about over the years. But if you’ve saved them as pins on Google Maps all this time, Google remembers them for you!
See How Close Stops Are Together On The Map
By plotting all of your potential stops on a map, you’ll be able to see how close they are to one another. If one is too far away from the others, you can cut it or find other things to do in the nearby area. This will also help you realistically divvy up what you can do each day of your trip.
Share Google Maps Trip Planner Between Groups
Google Maps makes it extra easy to share the Google Maps planner with multiple people. To do so, you’ll just click the “share” button under the title of your map and input your friends’ or family members’ email addresses. Be sure that you give them editing abilities! Then, you can all plan your trip together!
As an added bonus, you’ll have your itinerary saved forever! That means if some of your friends or family want to replicate your trip or try a few of your recommendations, you won’t have to try to piece it together again from memory. Instead, you can just share your Google Maps trip planner with them!
Access On Your Phone For Use When Traveling
Since Google Maps is accessible on both a computer and a phone, it is ideal for both the trip planning part of the process and actually traveling. However, unlike the rest of Google Maps, it’s not easy to download your customized map for offline access. That means that if you’re in an area with spotty service, you won’t be able to access your map. But there are work arounds using third-party apps, such as Map Plus or Maps.me.
Exactly How To Use Google Maps Trip Planner
Getting Started with the Google Maps Trip Planner
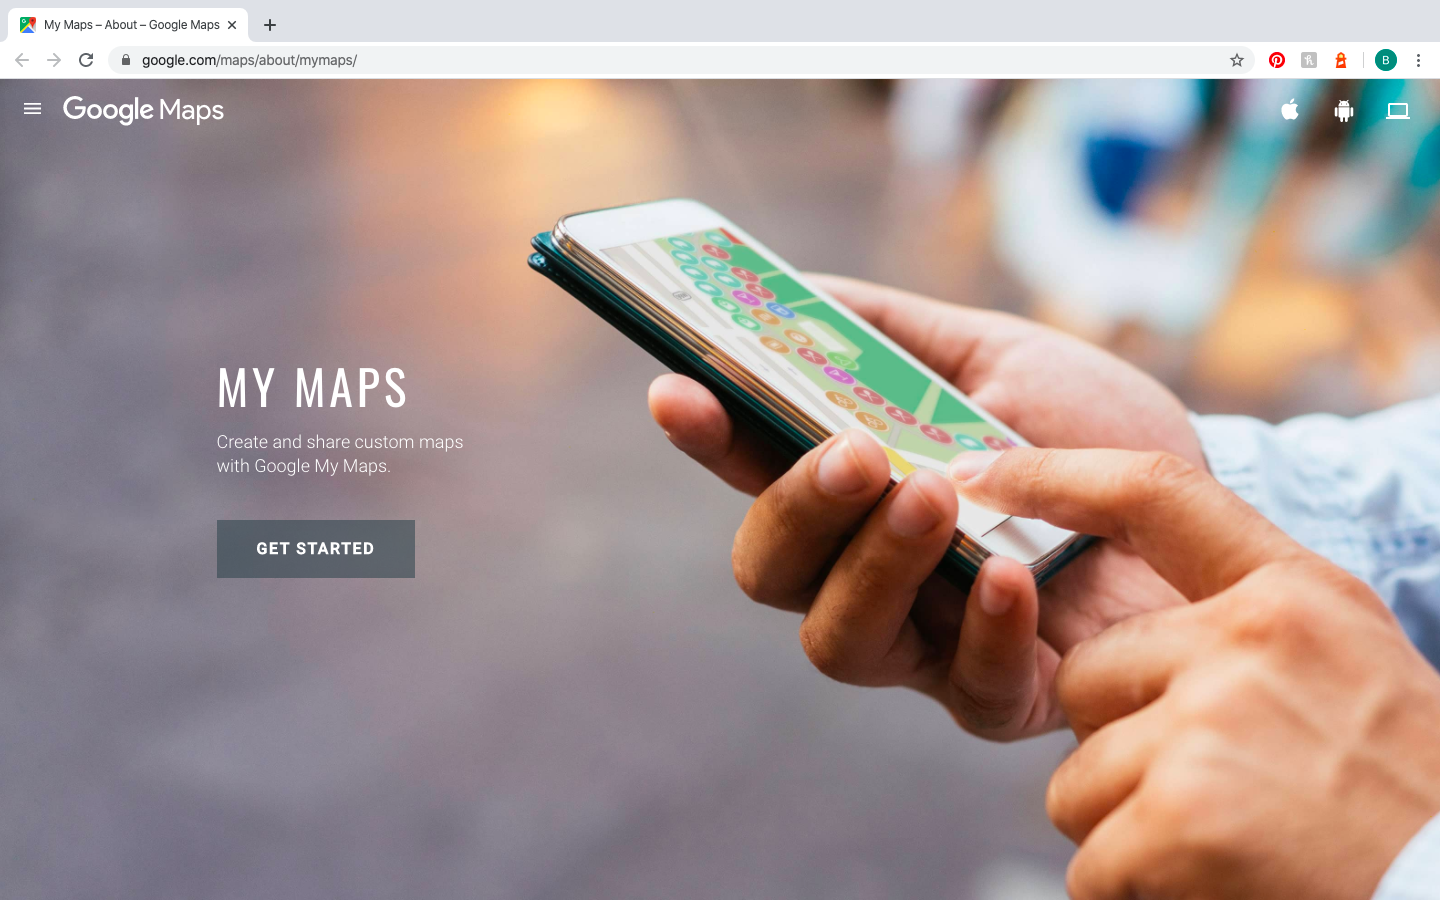
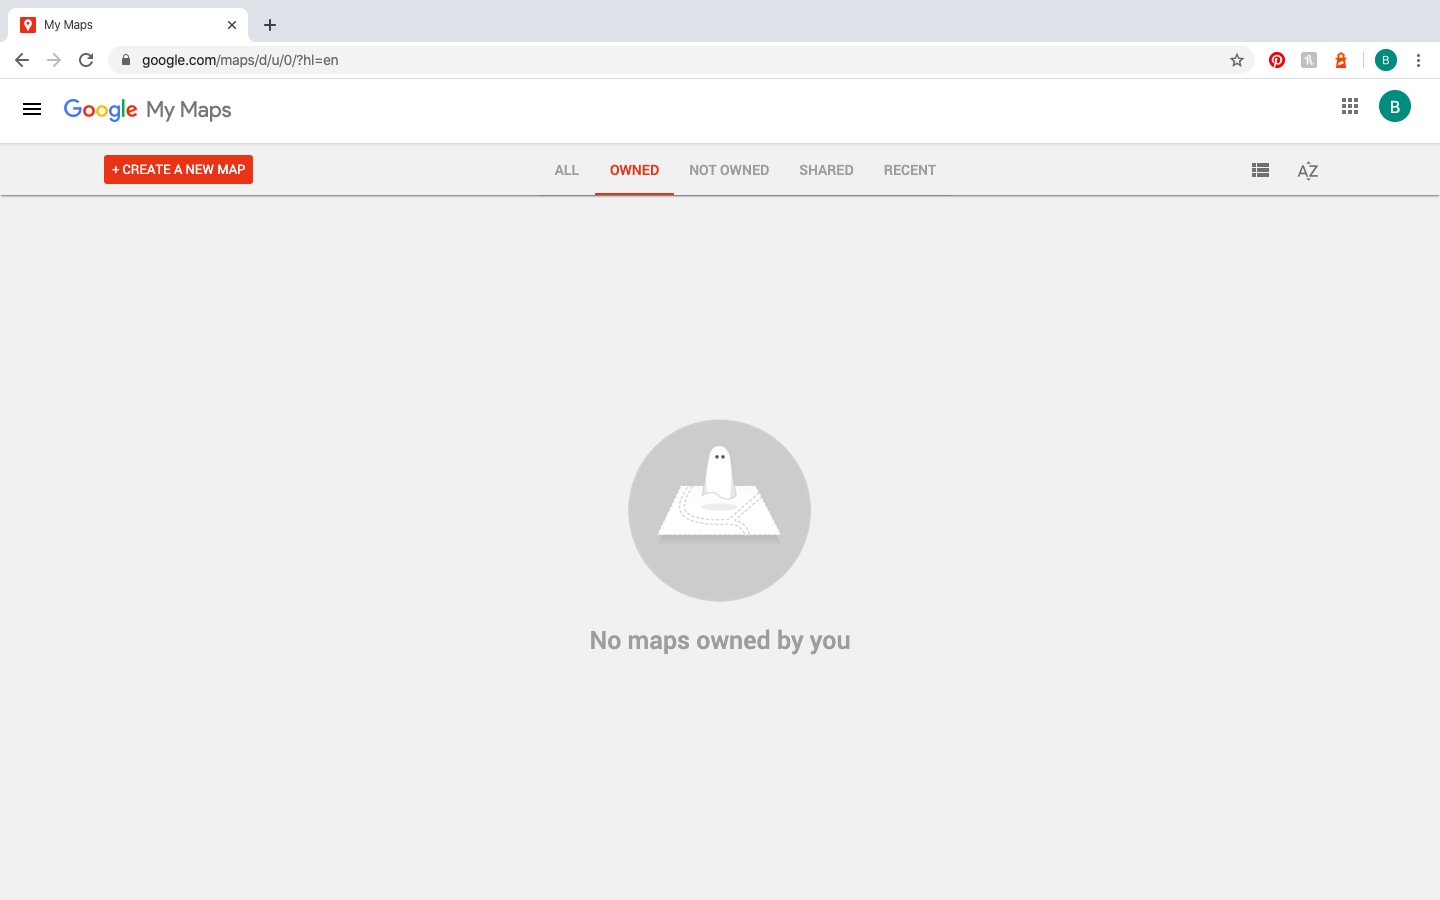
Head to Google My Maps on your computer. From there, press the “get started” button. Before you officially get to planning, check the top right corner of the screen to see if you are logged into your desired Google account. If not, change to the proper account.
Then, click the bright red button in the top left corner that says, “create a new map.”
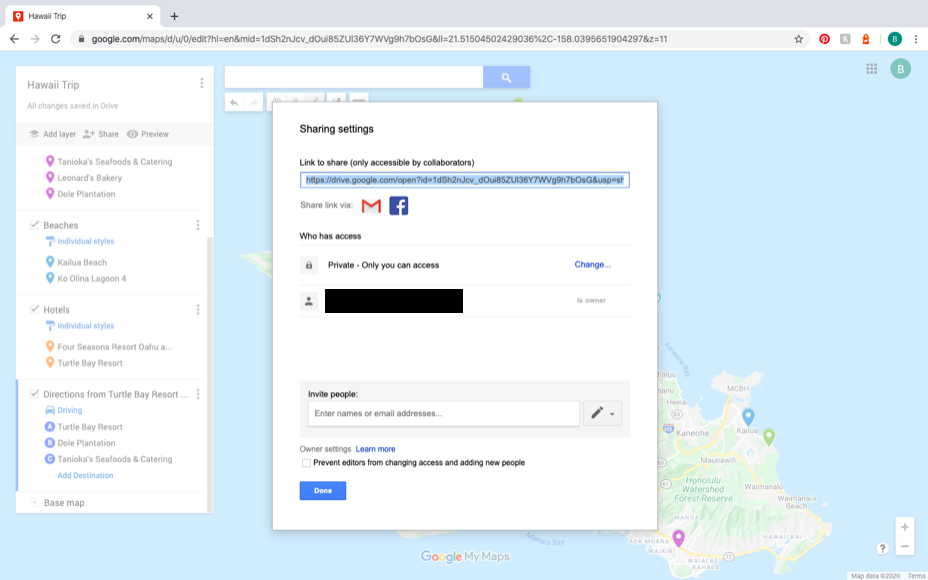
Title your new map in the top left corner. If you would like to invite your fellow travelers to the map, click on the share button below the title. From there, you can either share the link at the top or input their emails in the bar at the bottom of the “sharing settings” pop-up. If you would like your fellow travelers to be able to edit the document, click on the pencil icon to the right of the email bar. Select “can edit” from the dropdown menu. On the other hand, if you only want your fellow travels to see the document, select “can view” from the dropdown menu.
Adding Categorized Layers
When you first create a customized Google Maps trip planner, Google will automatically create your first layer for you. To change the title of the first layer, head over to the box in the top left corner and find the vertical ellipses (“…”) across from “untitled layer.” Click on the ellipses and select “rename this layer” from the dropdown menu. Rename the layer however you would like and click the blue “save” button. To wisely make use of these layers, consider labelling them by category (e.g. hotels, restaurants), by day of the road trip (e.g. day 1), or by traveler (e.g. Sarah’s picks).
To add more layers, click on the “add layers” button just below the title. It will, once again, autofill as an “untitled layer,” so you’ll repeat the steps mentioned above to change the title.
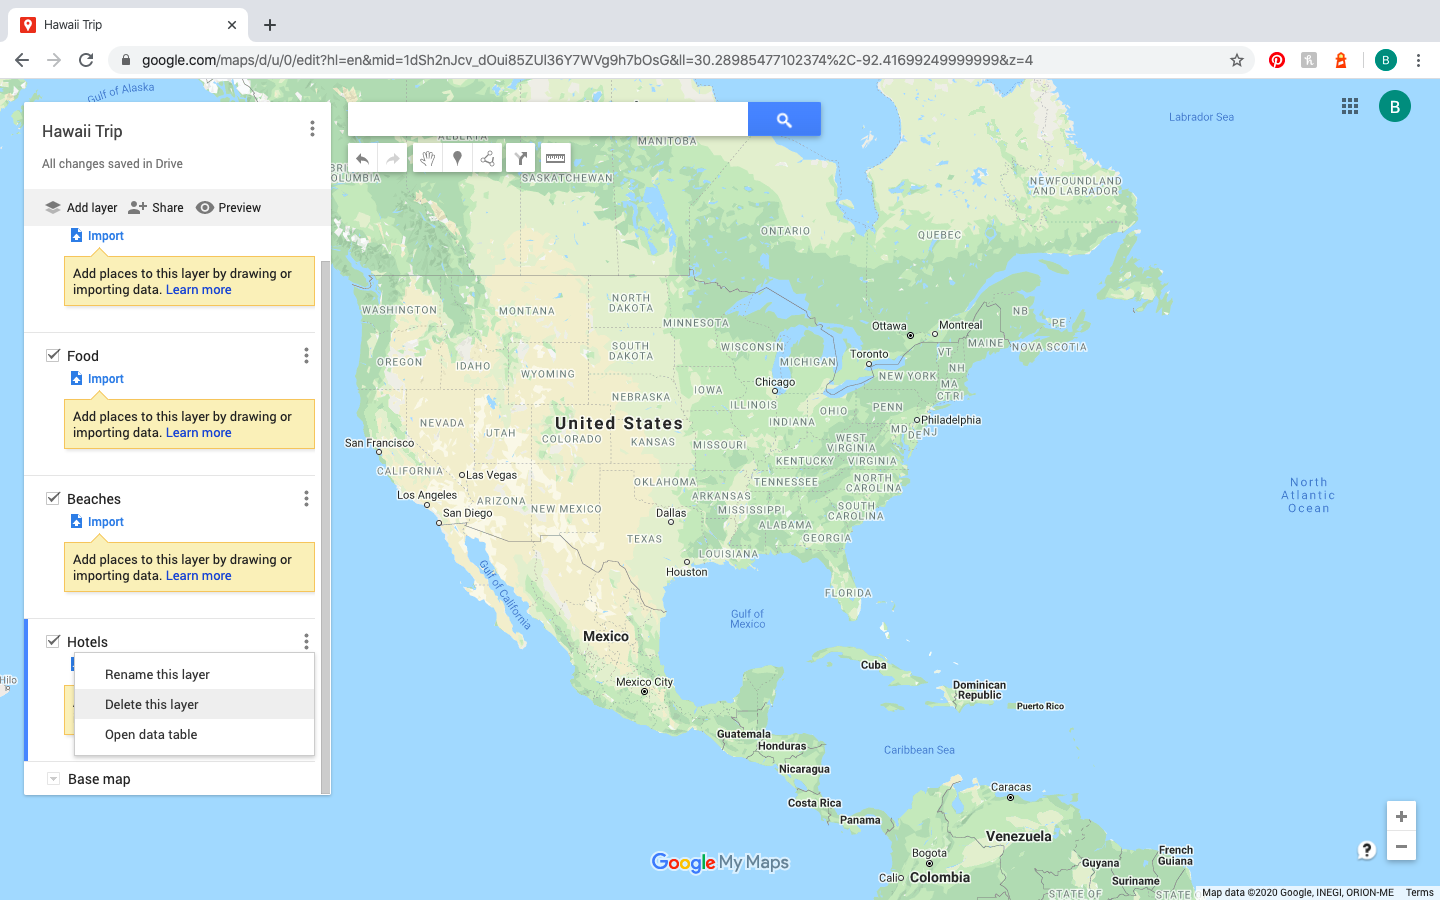
To delete layers, click on the vertical ellipses (“…”) across from the title of the layer that you’d like to delete. From the dropdown menu, select “delete this layer.”
Placing Location Pins
After you’ve added all of your categorized layers, you’ll want to start adding location pins. To start adding these pins, select the proper categorized layers. (The selected layer will have a blue line along the left edge.)
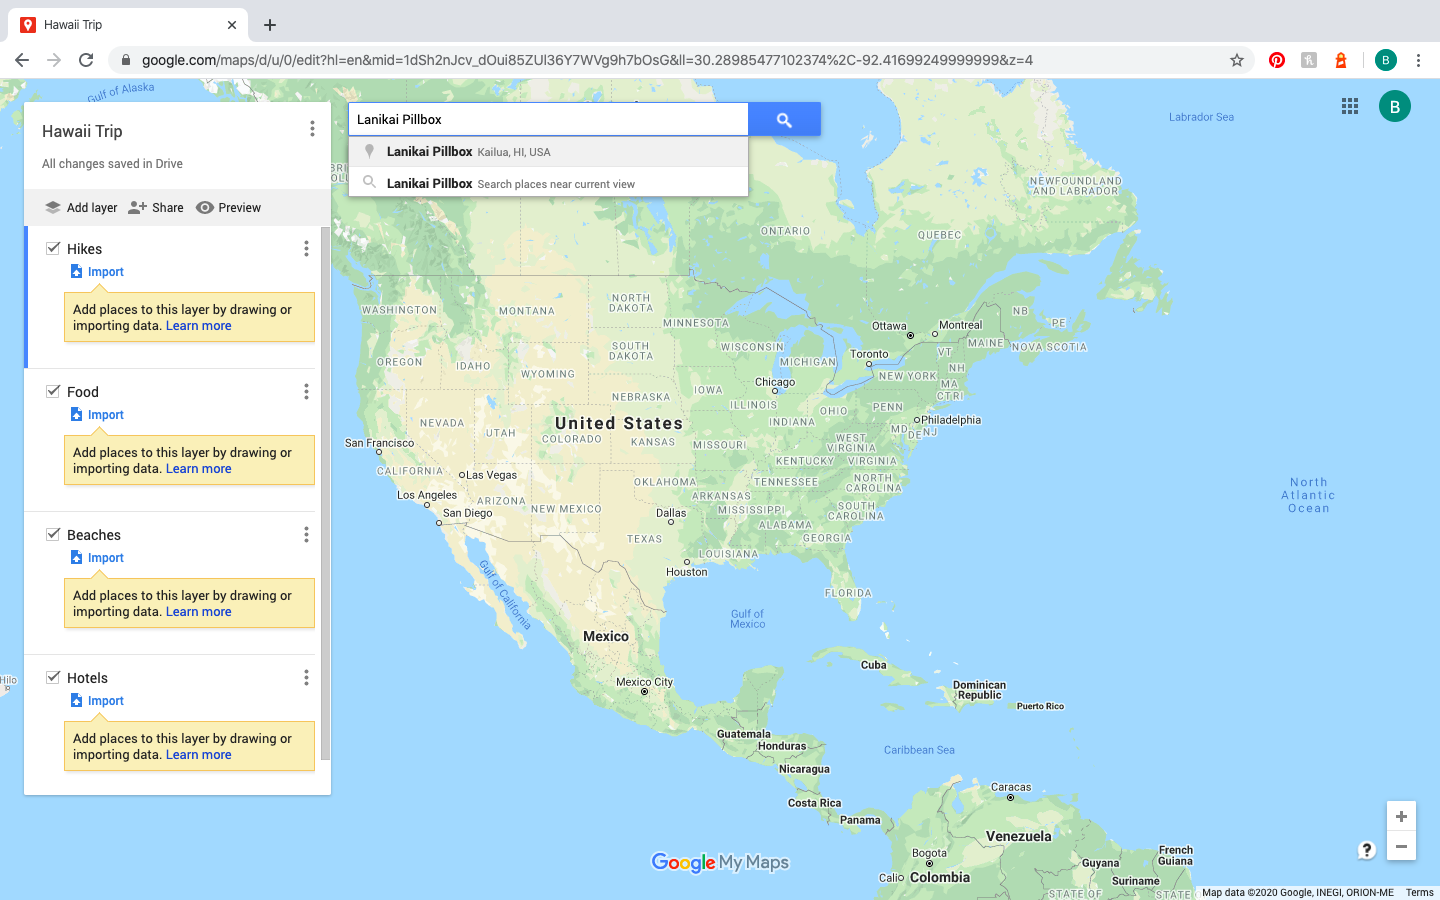
From there, direct your attention to the top of the screen to the map search bar. Type the name or address of the desired location into the search bar. Select the desired location from the dropdown menu. This will automatically generate a pin on the map of this location. To add the location to the selected layer, find the location on the box on the left side of the screen and click the “+” icon to the right of it.
If Google Maps does not have the location that you’re looking for, you have a couple of options. First, if you can identify the location by looking at a map, you can add a pin by selecting the pin icon just below the map search bar. Then, press the location on the map. From there, a pop-up will appear, allowing you to rename the pin. Once you’ve renamed it, press the blue “save” button. As an alternative, if you happen to know the longitude and latitude coordinates, you can also input those into the search bar at the top.
If you decide that you want to move one pin to another layer, simply click and drag the pin from the incorrect layer to the desired layer.
Customizing Location Pins
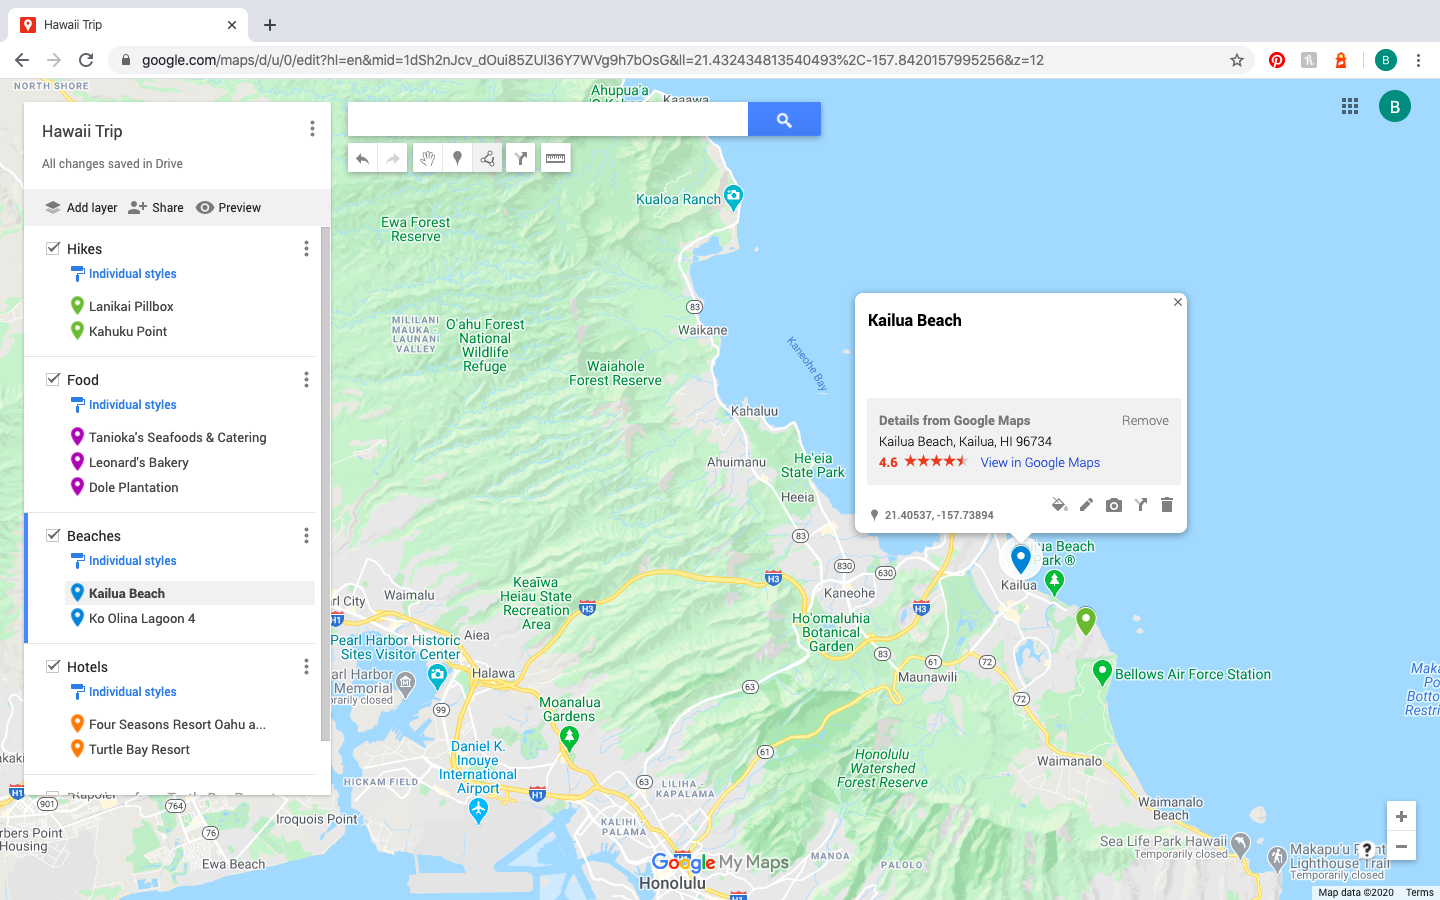
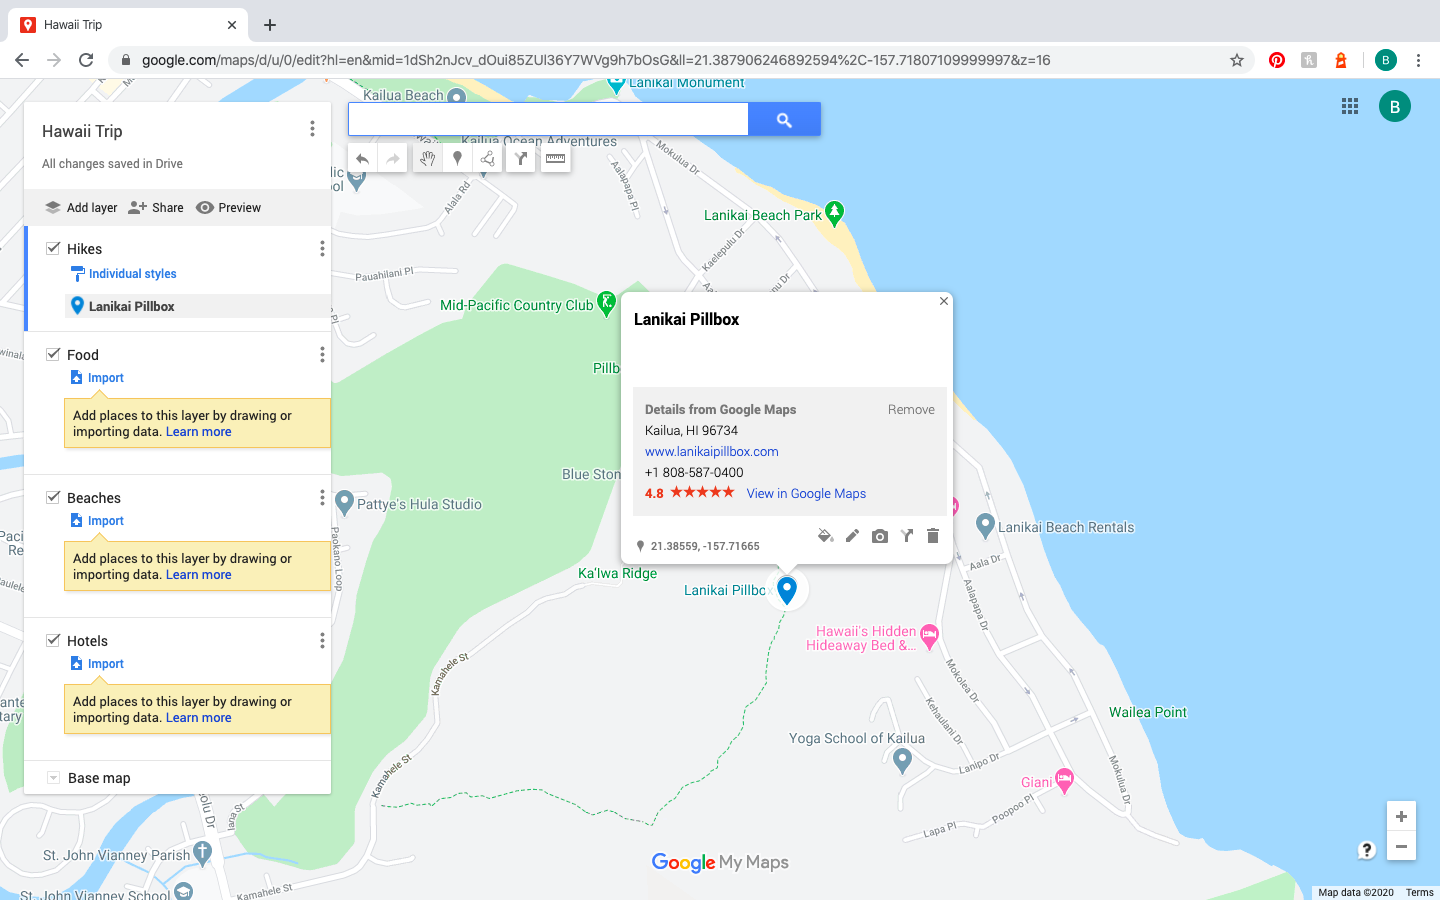
To change the color of a pin, you can either click on the desired pin or hover over the name of the location in the box on the left side. Either way, you will see a paint bucket icon. Click on that and select the color that you would like for that pin.
To change the title of a pin, click on the desired pin and click on the pencil icon at the bottom of the pop-up. Edit the title as desired and click the blue save button.
To change or add notes to a pin, click on the desired pin and click on the pencil icon at the bottom of the pop-up. Change or add notes as desired and click the blue save button.
To add a photo or video to a pin, click on the desired pin and click on the camera icon. From there, choose where the photo or video is located: on your computer (upload), web camera, image URL, your photo, Google Drive, Google Image Search, YouTube search, or YouTube URL. When you select the photo or video, press the blue “select” button.
Adding Directions
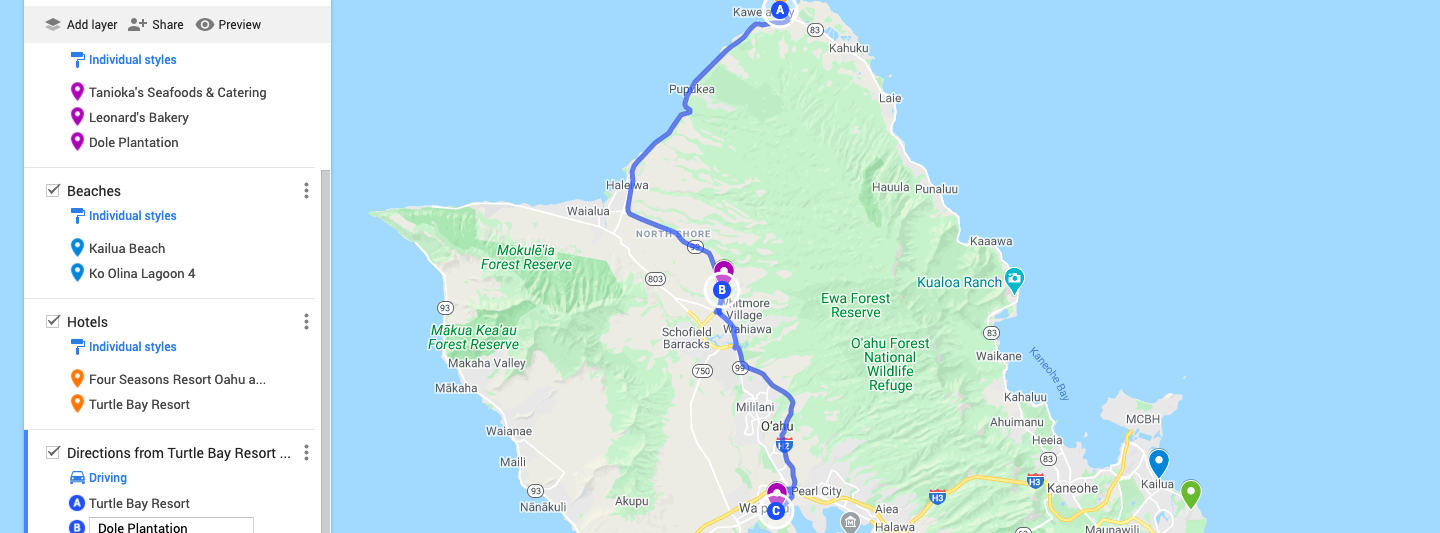
To add directions between your pins, select the starting point pin. Then, click on the “add directions” arrow below the search bar. This will add another layer in the box on the left side. Then, click on the pin of your end destination. If you would like to add multiple locations to your route, click “add destination” at the bottom of the box on the left. Then, select the pin you would like to add to the route.
To alter the order of the route, simply click and drag the locations in the box on the left to the desired order.
To change the directions from “driving” to “biking” or “walking,” click the blue “driving” button in the box on the left. Select the image of the desired form of transportation.
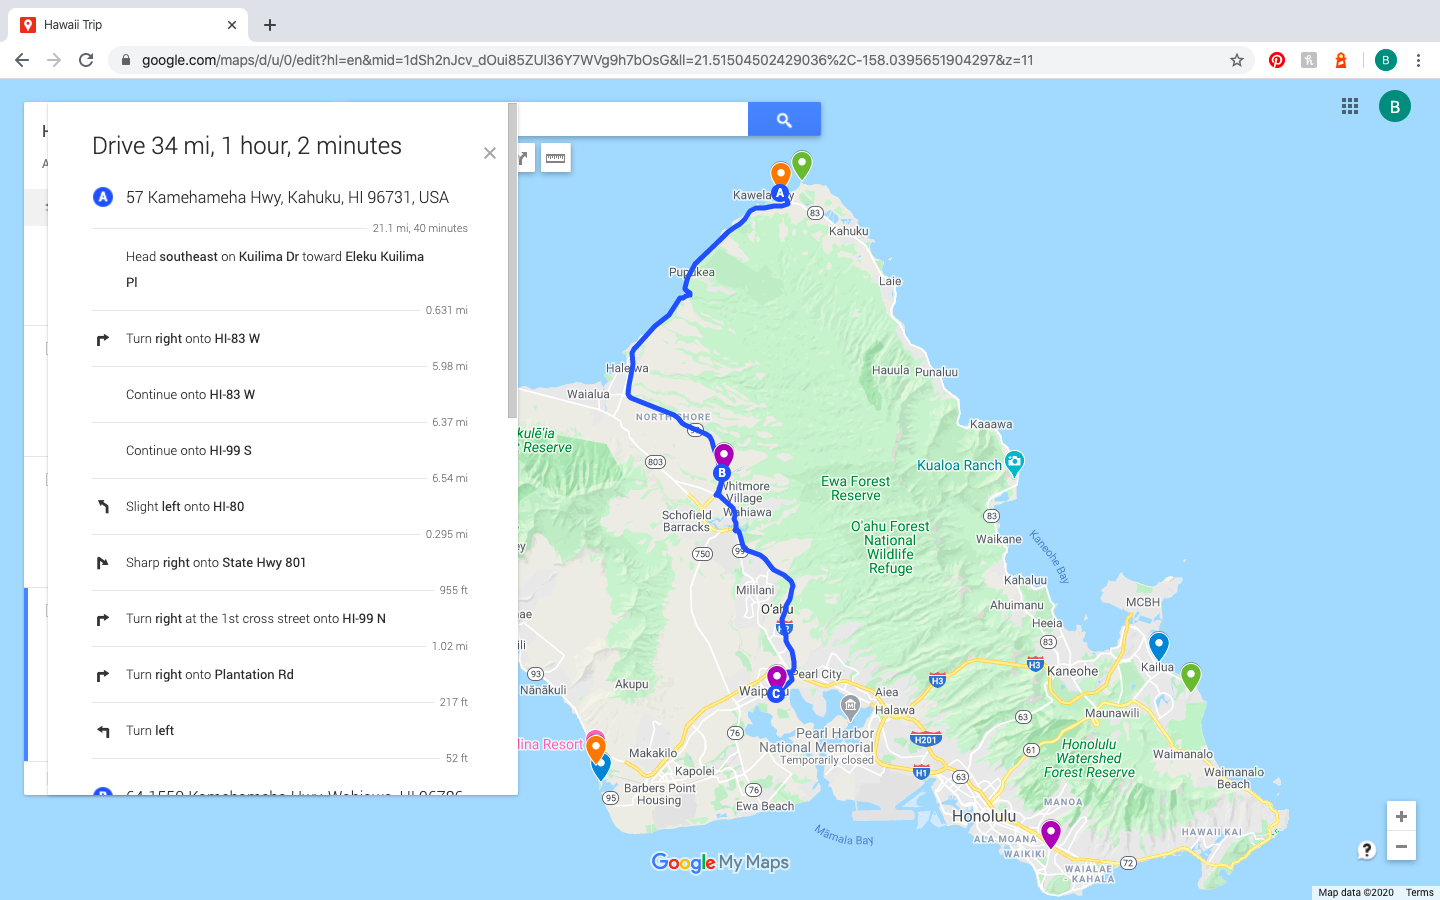
To get step-by-step directions and an estimated amount of time, click the vertical ellipses (“…”) next to the title of this transportation layer. Select “step-by-step directions” from the dropdown menu.
Accessing Your Google Maps Trip Planner on Your Phone
To access your Google Maps Trip Planner on your phone, make sure that you have the Google Maps app downloaded. From there, login to the same account that you used to plan a trip in Google Maps.
Click on the menu in the top left corner and click “your places” from the dropdown menu. Then, click on “Maps” and select the customized map that you would like.
Planning a trip on Google Maps can be so easy and can make your trip so much more organized and enjoyable! I hope you love using the Google Maps Trip Planner as much as I do!
 7 Things To Know Before Visiting Iceland In October