Welcome to the Grand Canyon State where choosing the best hikes in Phoenix is a real challenge because there’s no shortage of stunning mountains, valleys and ancient saguaro cacti. Hiking in Phoenix is a popular activity because of the constant sunshine all year long and the beauty of the desert. The Phoenix area boasts an abundance of beautiful mountain ranges, and preserves, and we’ve done our best to choose hikes from each of the major hiking regions. The hikes on our list can be done at any time of year.
Winter weather in Phoenix is ideal for hiking. With highs in the upper 60’s, the daytime is perfect for outdoor activities without running the risk of it being too hot. With spring comes cactus blooms and wildflowers and the desert erupts with life and color. Summer in Phoenix is notoriously hot. It is a dry heat, but still an unrelenting fiery heat, and will take the difficulty level of any hike up a notch. The mornings are kinder though and are a great time for hiking in the summer. In the fall, the temperatures start to gradually crawl back down and hiking during the day becomes more bearable. So grab your hiking shoes, water, a hat, and sunscreen and go explore all that the Phoenix hiking trails have to offer.
This is a guest post by Marjani Taylor.
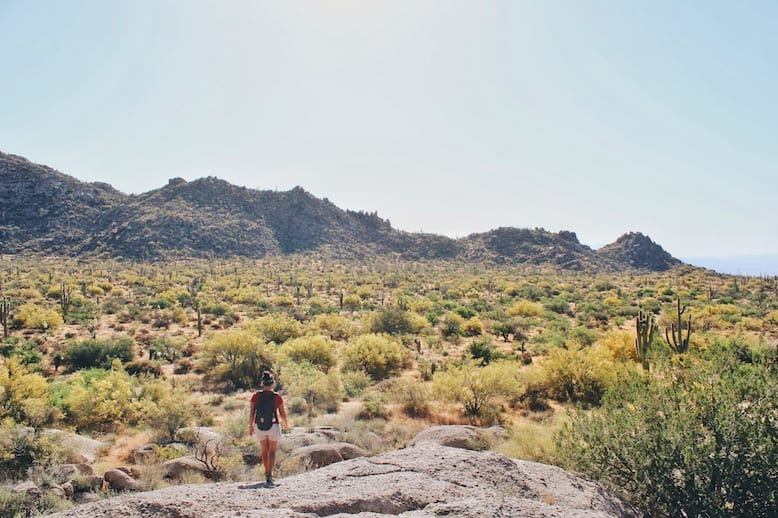
5 Best Hikes In Phoenix From The Area’s Major Preserves
Go John Trail (Go John Trailhead): Cave Creek Regional Park
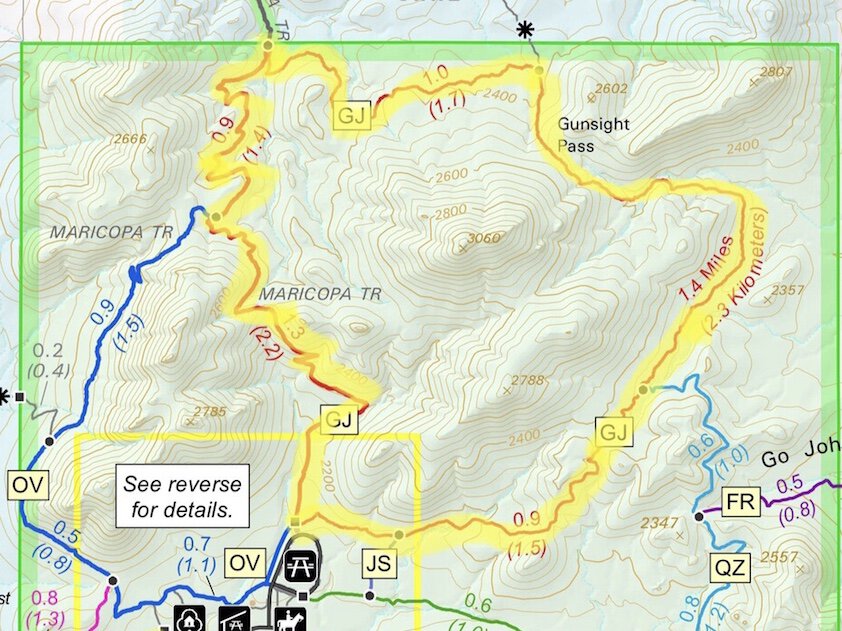
The Go John Trail is located in the Cave Creek Regional Park and is one of the best hikes in Phoenix for its plant life. As you enter the park you’ll see an entrance booth where you will be required to pay a $7 fee per vehicle. This area was once the home of the Hohokam Indians from 800 A.D. until 1400 A.D. The Park, which was dedicated in 1992, now includes 15 miles of Metro Phoenix hiking trails, a Nature Center, a family campground with 55 campsites, and a horse staging area.
There are a couple of hiking trails in the park and signs pointing to each one. Keep driving past the Overton Trail parking lot until you get to the Go John Trailhead. The parking lot is big enough for plenty of cars. There is also a bathroom at the parking lot in a brick building with two stalls each. The Go John Trail is a great mix of easy and moderate hiking sections as the trail rolls up and down but never breaks into an aggressive incline. You will no doubt get a good workout, but there are also plenty of moments throughout the hike where the trail levels out, and you can catch your breath.
There are two trailhead options, both stemming from the same parking lot. You can hike counterclockwise by taking the main Go John Trailhead, or you can take the Go John North Trailhead to hike clockwise and start your hike with a steeper incline. The hike is 5.8 miles and will take roughly 2.5 hours to complete. The Go John Trail is incredibly scenic with towering saguaro cacti sprawled everywhere including along the trail. In the spring, not only are the mountains and valleys filled with wildflowers, but the cacti are also blooming with large vibrant flowers. There is a lot of plant life in the area, so it’s always beautiful, not just in the spring. Be aware that if you are hiking the trail in the summer, there is no shade, so the constant sun has the potential to add to the difficulty of the hike.
If you’re looking to add some mileage to your hike it is possible to add the Overton trail onto your Go John Trail hike. If you choose to do both trails you’ll connect to the Overton trail around mile 4 of the Go John Trail. This will add about 2.1 miles to your total hike. The Overton Trail is not as scenic as the Go John and you’ll have to walk the final section of the hike on the road in order to get back to the Go John Parking Lot.
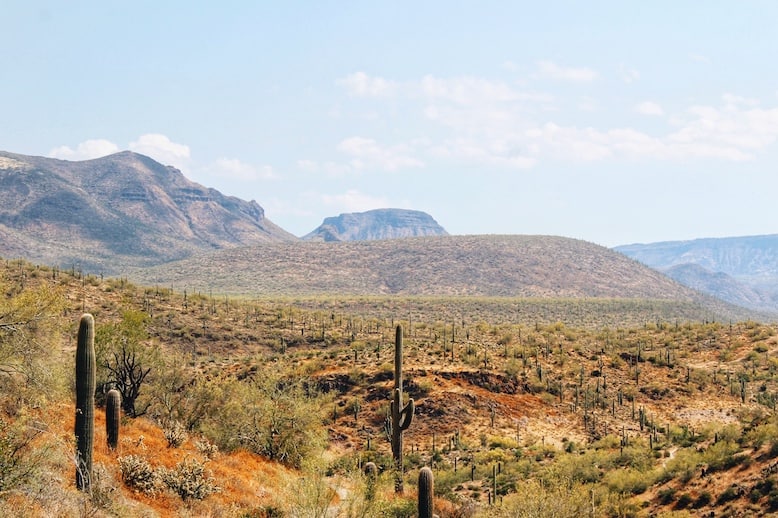
Quartz Ridge Trail (32nd Street Trailhead): Phoenix Mountain Preserve
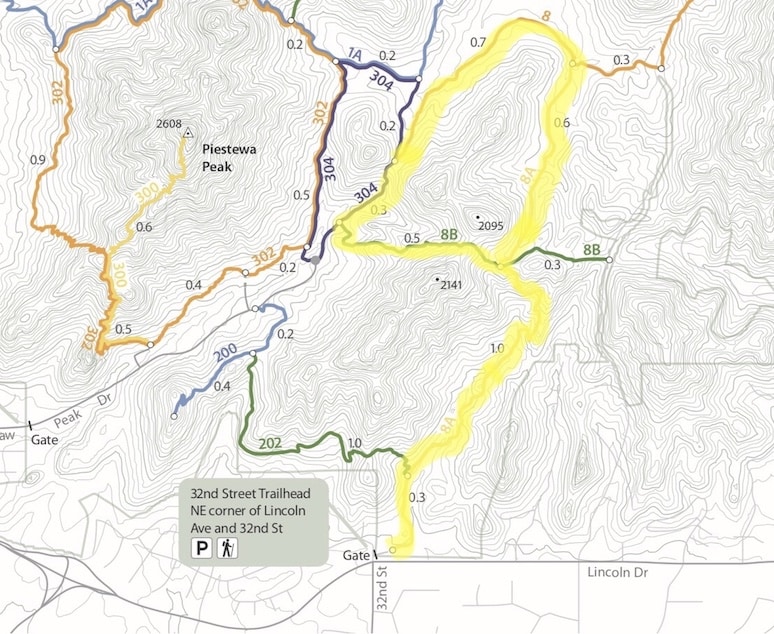
This hike that starts at The Quartz Ridge Trail is one of the best hikes in Phoenix because it combines 4 different trails to make an ideal hiking loop. This hike includes The Quartz Ridge Trail (8A), The L.V. Yates Trail (8), The Nature Trail (304), and The Ruth Hamilton Trail (8B). The total hike combined adds up to 4.6 miles. In order to find the trailhead on Google maps, search for “32ndStreet Trail Head” and you’ll see the parking lot and 8A trailhead. The parking lot at the trailhead is small, and it’s difficult to find parking on summer mornings or at any time the rest of the year. However, If you wait a few minutes, someone almost always finishes up their hike and opens up a space. Another option is to park across the street at the Starbucks and walk from there. It only adds a little to your total hike time and mileage.
The trails are clearly marked, with signposts indicating your options when the trails split. For just under 2 miles you’ll follow the 8A (Quartz Ridge Trail). Continue on this trail until you see the signpost marked with both a purple 8 sign for the L.V. Yates Trail and a green 8A sign marking the end of the 8A trail. As you hike trail 8, you’ll see the trail split, and you should keep left to stay on the trail. You’ll continue on trail 8 until you hit the 304 Nature trail. You’ll follow the Nature trail roughly until Mile 3 at which point you’ll hit the 8B trail which will take you on a challenging incline to finish your loop around the mountain. At the top of the incline is a bench for resting and enjoying the views. You’ve now completed the loop and will continue walking straight to link back up with the 8A trail. Finish your hike down the mountain on the same section of trail with which you started your hike. Don’t turn left or you’ll just start the loop around the mountain all over again.
This is generally a moderate hike with the end of the loop around the mountain edging towards difficult. The first mile of the hike is a constant incline. It definitely gets your heart pumping but is gradual enough so as not to be too punishing. The loop around the mountain has small ups and downs, but for the most part remains relatively flat. The last section of the loop is the most challenging. It’s a pretty small portion of the total hike, but it is a quad burner as you climb your way up a steep incline on uneven rock. The final section of the hike back down the trail is completely downhill and is the fastest section of the hike. There is no shade on the trail so be sure to bring plenty of water and wear a hat and sunscreen.
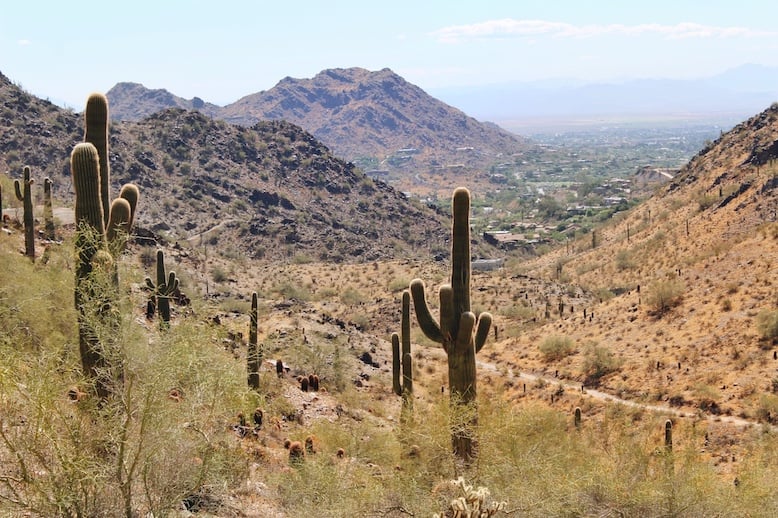
Sunrise Trail (Lost Dog Wash Trailhead): McDowell Sonoran Preserve
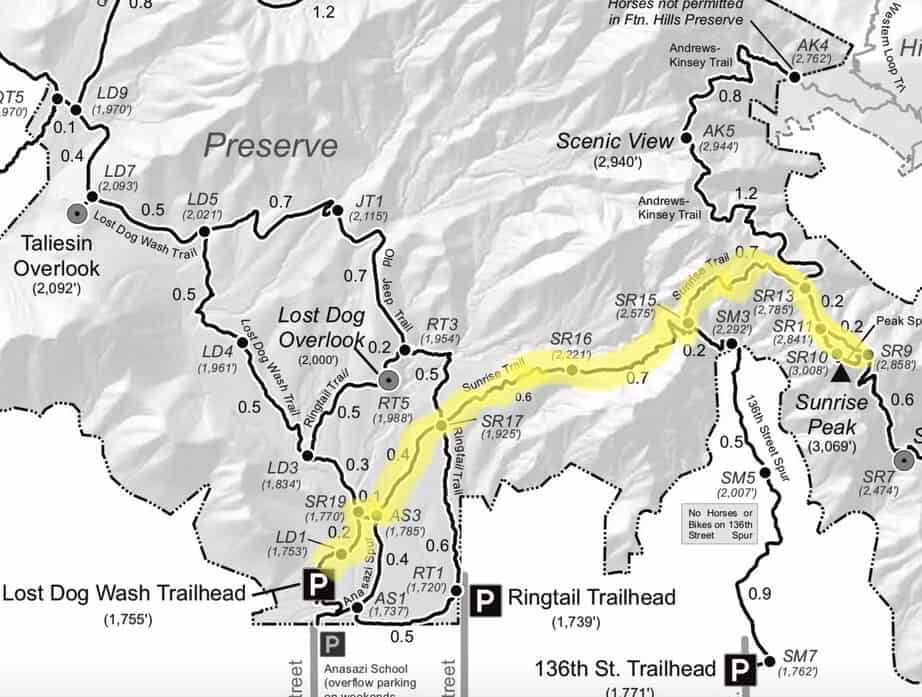
For this McDowell Sonoran Preserve hike, you’ll want to begin your hike at the Lost Dog Wash Trailhead on 124thstreet north of Shea Boulevard. The parking lot at the trailhead is large, and it is never a challenge finding a parking space. Located at the start of the trail is a covered building with bathrooms, filtered water, a dog bowl and fountain for your pets, and maps of trails in the preserve. On weekends there are even McDowell Sonoran Conservatory volunteers at the trailhead to offer up any information you might need or find helpful.
There are many different trails in the preserve so be sure to pay attention to the signposts. The trails are well marked, but if you’re not paying attention it’s possible to accidentally take a different trail when the path forks. The signposts are marked with the trail names, emergency marker numbers, the current elevation and the trail segment length. Following the signposts is pretty straightforward except for when you hit the wash towards the end of your hike on your way down the mountain. There’s a sign pointing you in the right direction, it’s just not as immediately visible as the other signs throughout the hike. Your whole way up the mountain you will be following signs for Sunrise Trailhead and Sunrise Peak. On your way back the signs will point you toward the Lost Dog Wash Trailhead.
The Sunrise Trail is an up and back trail of moderate difficulty (though the last .2 miles up to the summit definitely borders on being difficult). The whole hike to the summit is a steady uphill climb with few stretches of trail that ease up enough to give you a reprieve. If you’re tired or running short on breath, take some stops on your way up. There’s no shortage of stunning views to appreciate along the way, so take it in and give yourself a break if you have to. Just when it looks like you’re reaching the top of the mountain, the remaining mile of the hike will come into view. You’ll follow the curve of the trail around the side of the mountain before crossing the saddle. Then it’s time to tackle the summit!
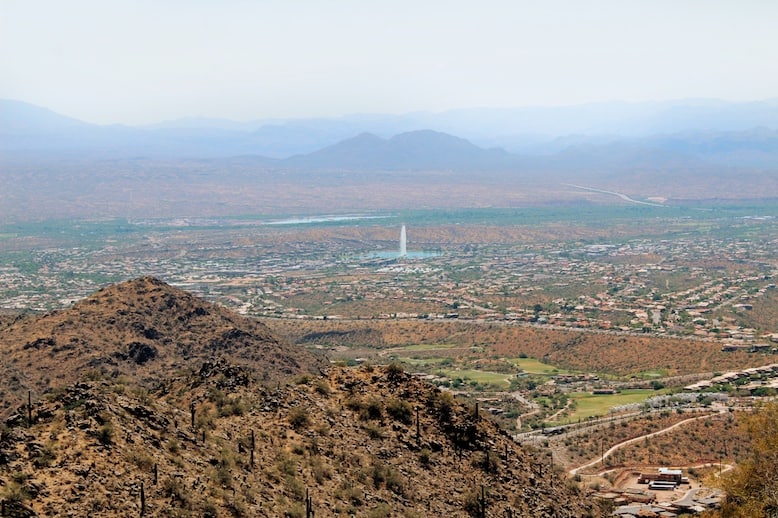
The view from the top is what makes this one of the best hikes in Phoenix. You don’t have to climb all the way up to the summit. You still get beautiful views at the end of the saddle by the horseshoes. There’s no shame in turning back here, but if you have energy left in the tank and are feeling adventurous, you’ll hike a steep .2 miles more to the summit to experience sweeping panoramic views of Fountain Hills and Scottsdale. Make sure you follow the signs for Sunrise Peak. They will lead you right to the top of the mountain.
Granite Mountain Loop Trail (Granite Mountain Trailhead): McDowell Sonoran Preserve
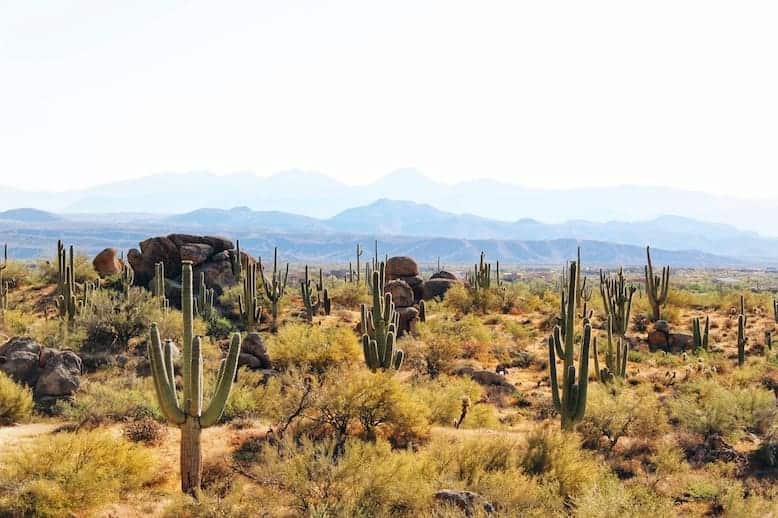
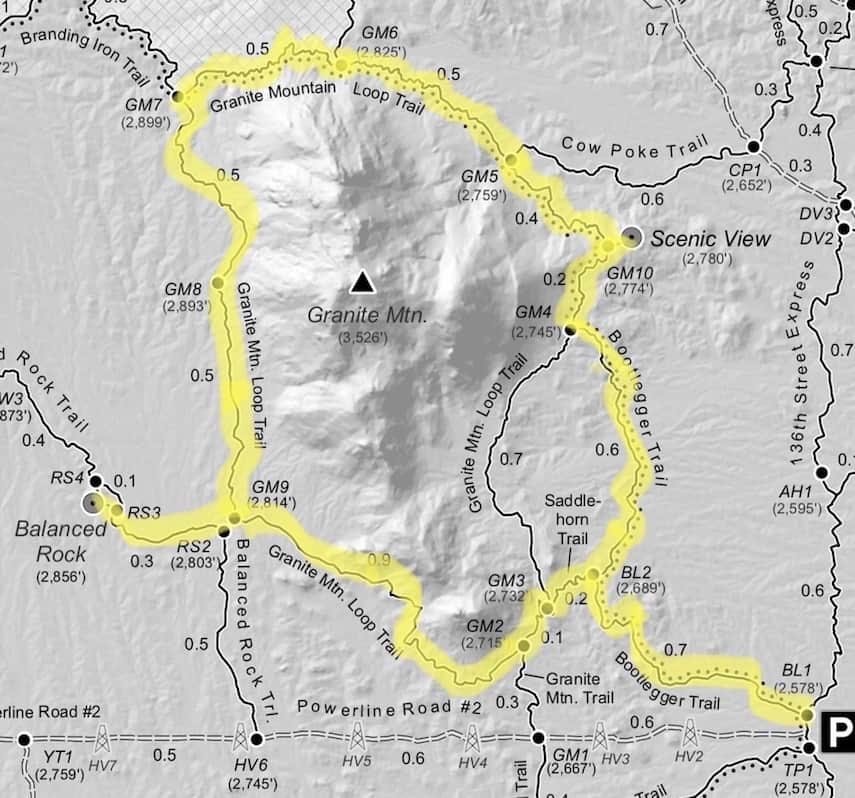
Beautiful wildflowers, healthy blooming saguaros, and fields of giant boulders, make the Granite Mountain Loop one of the best hikes in Phoenix. You will feel like you’re walking through a vast desert garden. The Granite Mountain Loop Trail is also located in the McDowell Sonoran Preserve, but in the Northern region. This roughly 6.5 mile hike is a relatively flat loop with no incline hike to a summit. The trail meanders around Granite Mountain and though it’s not short, it is easy to hike. Even in the summer, there are very brief sections of the hike that are in shade.
There is plenty of parking at the Granite Mountain Trailhead. There are also bathrooms and maps at the trailhead facilities. Though the majority of this hike is on the Granite Mountain Loop Trail, it actually begins and ends on the Bootlegger and Saddlehorn Trails. Your hike will begin with .7 miles on the Bootlegger Trail (headed towards the Granite Mountain Loop Trail). You’ll then arrive at a signpost that will give you the option of going left on the Saddlehorn Trail to Granite Mountain Loop Trail or right to continue on the Bootlegger Trail to Granite Mountain Loop Trail. Choose the option to the left and take the Saddlehorn Trail. You’ll only be on this trail for .2 miles before you hit the Granite Mountain Loop Trail.
You’re now 1.2 miles from Balanced Rock. Hike .9 miles on the Granite Mountain Loop trail, then break off the loop and hike .3 miles down the Balanced Rock Trail to Balanced Rock. This rock formation is fascinating and looks like it should not be physically possible. Climb up to the rock for great photo ops and views of the surrounding area. You’ll now double back and hike the same .3 mile trail section back to the Granite Mountain Loop Trail. Head left and you’ll now be hiking for an extended period of time on the Granite Mountain Loop Trail as you work your way around the mountain. On the other side of the mountain is a scenic viewpoint. If you want to stop here for a moment, it’s just a short 30-second walk off the trail. After stopping for a breather and great views, you’ll continue on the Granite Mountain Loop Trail for .2 miles before going left to take the Bootlegger trail.
A total of 1.3 miles on the Bootlegger Trail will take you all the way back to the parking lot. The last .7 miles of the Bootlegger Trail are the same .7 miles you walked to begin your hike. As you approach the parking lot, the final signpost you see will give you the option of taking the Bootlegger Trail to 136thStreet Express for .2 miles of the Connector Trail to the Granite Mountain Trailhead Parking Lot for .1 miles. This is confusing, but you’ll want to take the Bootlegger to 136thStreet Express. This will lead you straight to the trailhead facilities and parking lot.
Holbert Trail to Dobbins Lookout (Holbert Trailhead): South Mountain Park
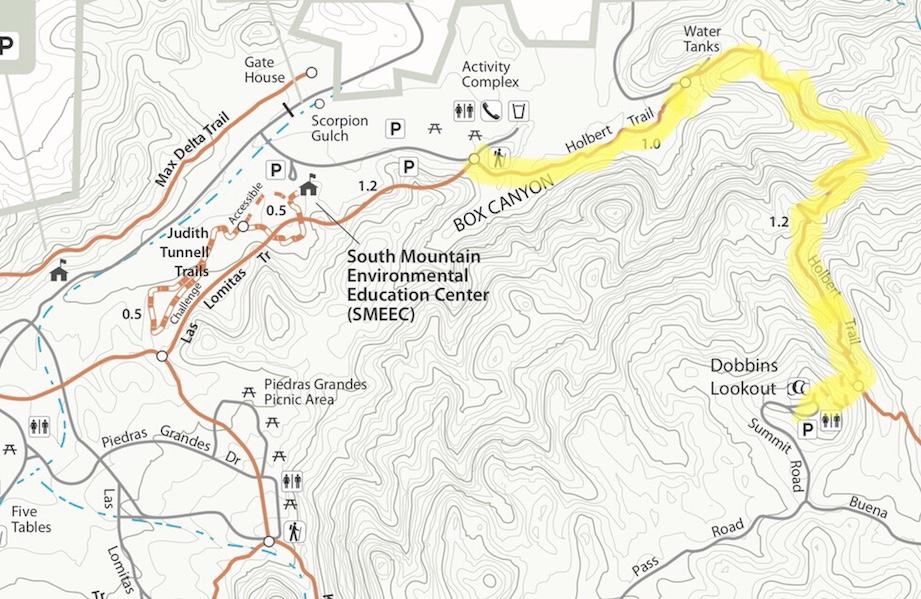
South Mountain Park offers a whole score of trails, but the real gem of the park is the Holbert Trail hike to Dobbins Lookout. The Holbert Trail wins its spot among the best hikes in Phoenix because of its stunning, unobstructed views of Phoenix and the surrounding cities. When you enter South Mountain Park you’ll turn left past the visitor’s center and continue down the road until you hit the parking lot for the Holbert Trail. The parking lot itself is quite large and accommodates many cars. The area surrounding the trailhead has bathrooms, water fountains and picnic tables.
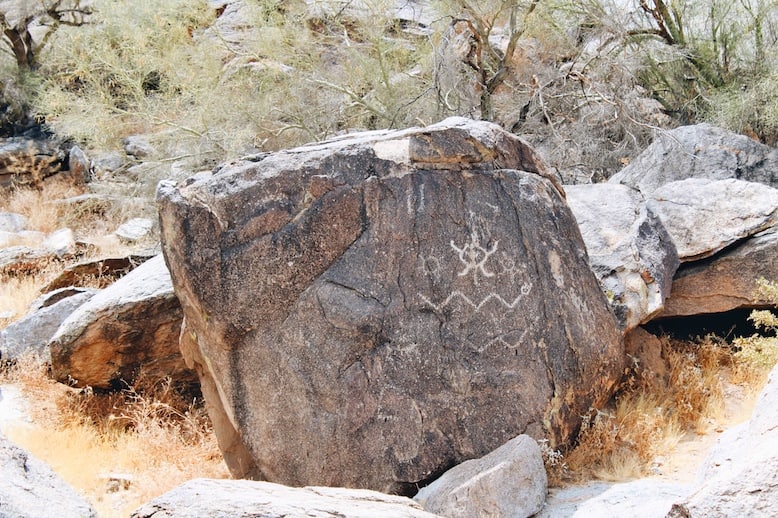
This out and back hike is 2.5 miles each way (5 miles round trip), and is moderately difficult. The hike begins with a relatively easy stretch on flat ground. Just half a mile into the hike you’ll be greeted with fascinating petroglyphs, carved by the ancient inhabitants of the area, that have stood the test of time. Keep an eye out for the artwork on the boulders and cliff faces throughout this section of the hike. A little further on, you’ll come across a paved road. You’ll briefly walk along this road before getting back on the dirt trail. Once back on the trail, the hike increases in difficulty as you begin the steady climb upwards.
The path becomes rocky (though the rocks are very stable), and the switchback up the mountain is sure to get your heart pumping. There are brief intervals of shade throughout the hike, but the majority of the hike is exposed. You’ll follow signposts with H’s on them all the way up the mountain to stay on the Holbert Trail. You’ll only diverge from this trail when you reach the sign saying “Dobbins Ext.” Here you’ll turn to the right and continue to hike upwards until you reach the Dobbins Lookout.
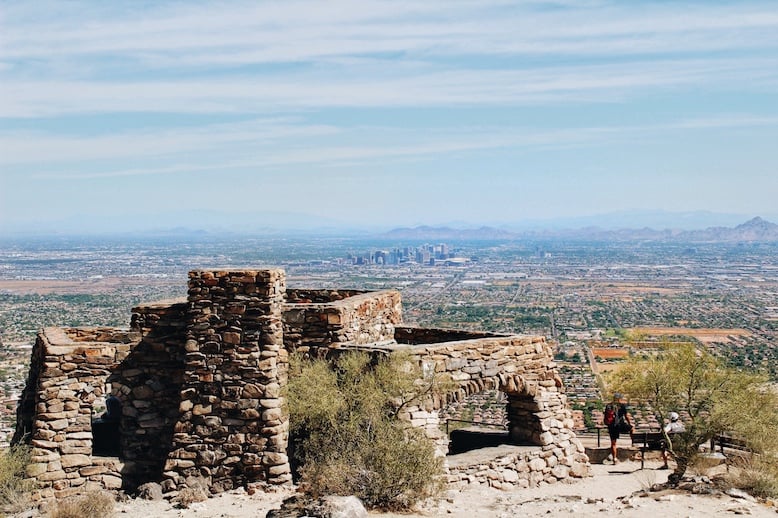
Dobbins Lookout is comprised of a small compass observation deck, a large stone structure (inside you can find reprieve from the sun), some benches, and stunning views of Phoenix that are unmatched by any of the other hikes on this list. This is one of the best Phoenix hikes at nighttime too because it allows you to take in the beauty of the sparkling city lights. It is also possible to drive to Dobbins Lookout without hiking at all. There’s a parking lot right next to the lookout with bathrooms and water. This means that even if there are few people on the trail, the lookout could be crowded with visitors. Be prepared to share the view. When you’re done at the top, the hike back down to the trailhead is all downhill and relatively easy.
Why Camelback Mountain and Piestawa Peak Were Not Included In The Best Hikes In Phoenix
Camelback Mountain and Piestawa Peak are two of the most popular hikes in Phoenix and yet they have been left off our list of the best hikes in Phoenix. There are a couple of reasons why. Camelback Mountain is now overrun with hikers. There is congestion both on the mountain and in the parking lot. A guard now stands outside the parking lot letting one car in per car that exits. You could end up waiting 45 minutes just to get parking spot. The views of Phoenix from the peak are undeniably great, but it’s just not worth the hassle anymore to even get on the mountain in the first place.
Piestewa Peak is a challenge meant to test your fitness, but is far less interesting than the other hikes on our list. We chose our list of the best hikes in Phoenix for their complete hike experience. Piestewa will give you a great workout but it’s lacking in high caliber sights to take in along the way. It’s also heavily trafficked like Camelback and is only becoming more and more crowded by the year.
How To Best Prepare For Hiking In Phoenix
Bring plenty of water. Each of these Phoenix hiking trails requires roughly two quarts of water. Some of the hikes have drinking fountains at the trailhead, which is great for before and after the hike, but it’s essential you have a water bottle or bottles during the hike to keep you hydrated. Bring extra water in the car for rehydration, and a reusable bottle so you can fill it up at the drinking fountain (if there is one) after the hike. The summer heat is brutal and it’s easy to get dehydrated quickly if you don’t come prepared.
Bring a hat. Baseball hats will get the job done, but in the summer, many people wear hats that cover both your face and neck. The sun can be relentless in the summer months and wearing a hat will decrease the heat’s effect on you as you power up the mountain.
Wear Sunscreen. Like wearing a hat, sunscreen is essential for keeping the effects of the sun at bay. Look for a sunscreen that is a high SPF and is water/sweat-proof. You’ll be sweating a lot, and you don’t want to wipe away all the sunscreen.
Enjoy the animals but leave them alone. One of the beauties of hiking in the desert is experiencing desert wildlife. It is possible to see cottontail rabbits, endless species of lizards and geckos, many different types of birds, rattlesnakes, the occasional desert tortoise, among others. These animals are fascinating and the rabbits are adorable, but when you’re hiking, please leave them be and enjoy them from a distance. It’s particularly important you leave the rattlesnakes alone. You might not ever see one on the trail, but if you do, leave them be. If you don’t bother them they won’t bother you. If you’re too close or aggravating them, they’ll shake their rattle to warn you off. Heed their warning, walk away slowly, and it will all turn out just fine.
Know Your Limitations. Don’t push your body to its limits when hiking in Phoenix. Heat exhaustion is very real, you’re in the desert, and Phoenix summer days have the potential to be unbearably hot. Listen to your body and if it’s had enough, stop.
The beauty of the Phoenix hiking trails will undoubtedly stun you time and time again. With endless sunshine, there’s no shortage of great hiking days in the Phoenix area. And who doesn’t love stunning city views, desert tranquility, and towering saguaros? Unpack your hiking boots, lather on the sunscreen and see for yourself why these are the best hikes in Phoenix. After you are done hiking, check out some lovely hotels near Phoneix to relax and unwind after hitting the trails. If you have any questions or want to share your own experiences of hiking in Phoenix, we’d love to hear your thoughts in the comments.

 12 Beautiful Beaches In Sicily + Map To Find Them